You can easily recreate, from your published PDF, an "author" version of your article (final published manuscript without publisher formatting) through Word.
Create an editable document with Word from a PDF file
Open the Word application, then click on " File" > "Open" > Select the "publisher" version > "Open"

Check the recreated "Author" version of your article
It’s important to check if the Word document text matches what was in the original published PDF "Publisher" version.
You should review the document, spot any errors, and correct them.
Special attention is required for :
- Special symbols and alphabets (Greek letters, mathematical symbols… )
- Chemical formulas
- Tables
- Correct retrieval of images
- Footnotes : You don't have to treat them as footnotes in Word; they can be grouped together at the end of the document, after the text of the article. However, it is important to check that the numbers match the footnotes and that they are correctly mentioned in the text.
- Likewise for tables and figures : if it simplifies your layout, you can place them all in the correct order at the end of the article.
- Formulas, images or tables that were not correctly recovered from the original file can be retrieved from the "Publisher" PDF as images, using screenshots.
If the quality isn’t sufficient, contact the ORBi team so we can retrieve these elements with our software.
[Optional] Apply the existing "ORBi" styles
If you wish, you can apply the "ORBi" style sheet (or any other) to your document.
This step is optional if you don't want to use a specific template.
Save a Template
You will then be able to systematically open a new Word file using the style of this template.
- To open it, click "File", then "Open", then "New".
Next, select "Personal" to find your personal templates saved on your computer.
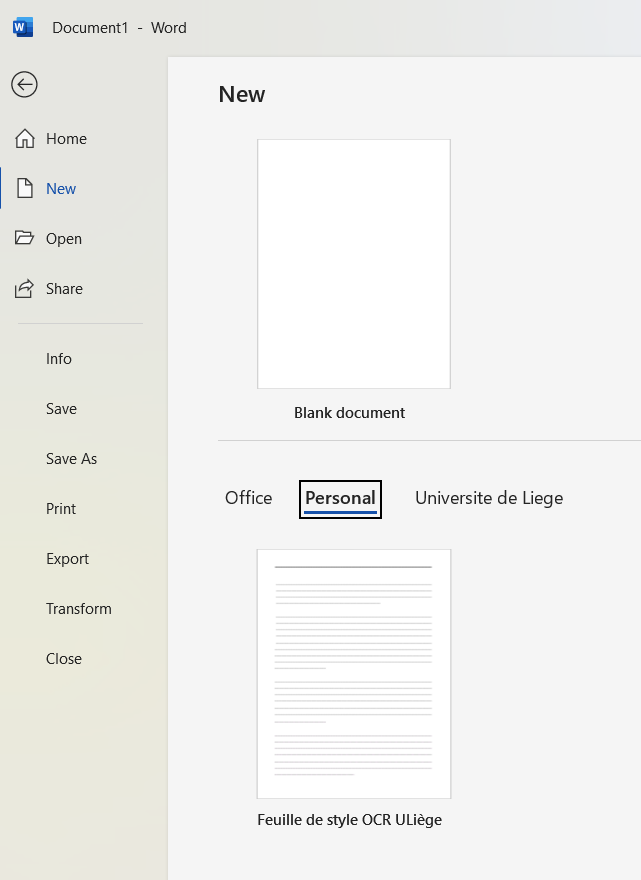
- You can then copy/paste the content of the Word document converted from the "Publisher" version of your article into this new file.
[Optional] Insert the "ULiège" header in the document
This step is optional if you do not wish to use a header template.
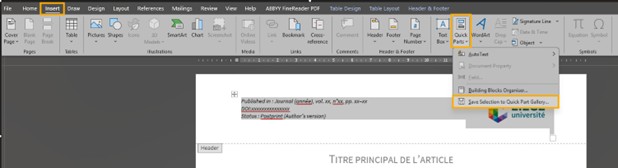
Add the header from the ULiège style sheet to the Quick Parts (you only need to do this once)
- Open the Feuille de style OCR ULiège file
- Go to the "Insert" tab
- Go into the page header and select its content
- Then click "Quick Parts" and select "Save Selection to Quick Part Gallery… "
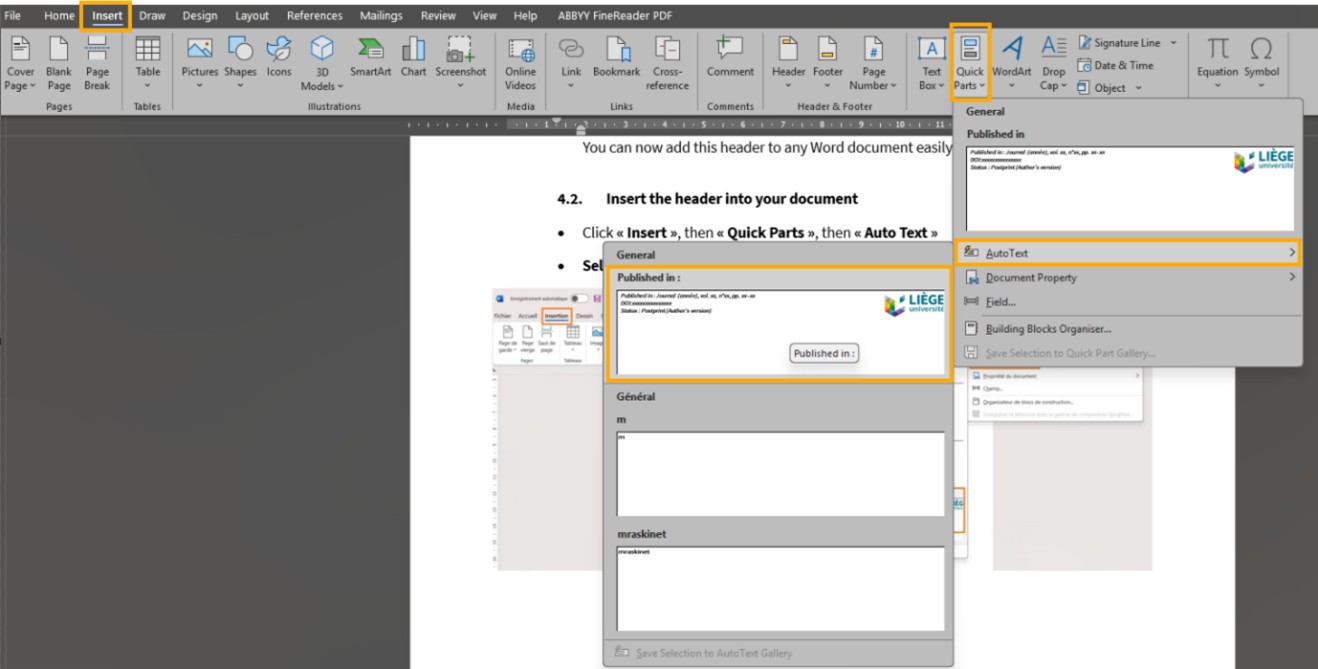
Insert the header into your document
- Click "Insert", then "Quick Parts", then "Auto Text"
- Select the header from the list to insert it into your document